Create an Assistant
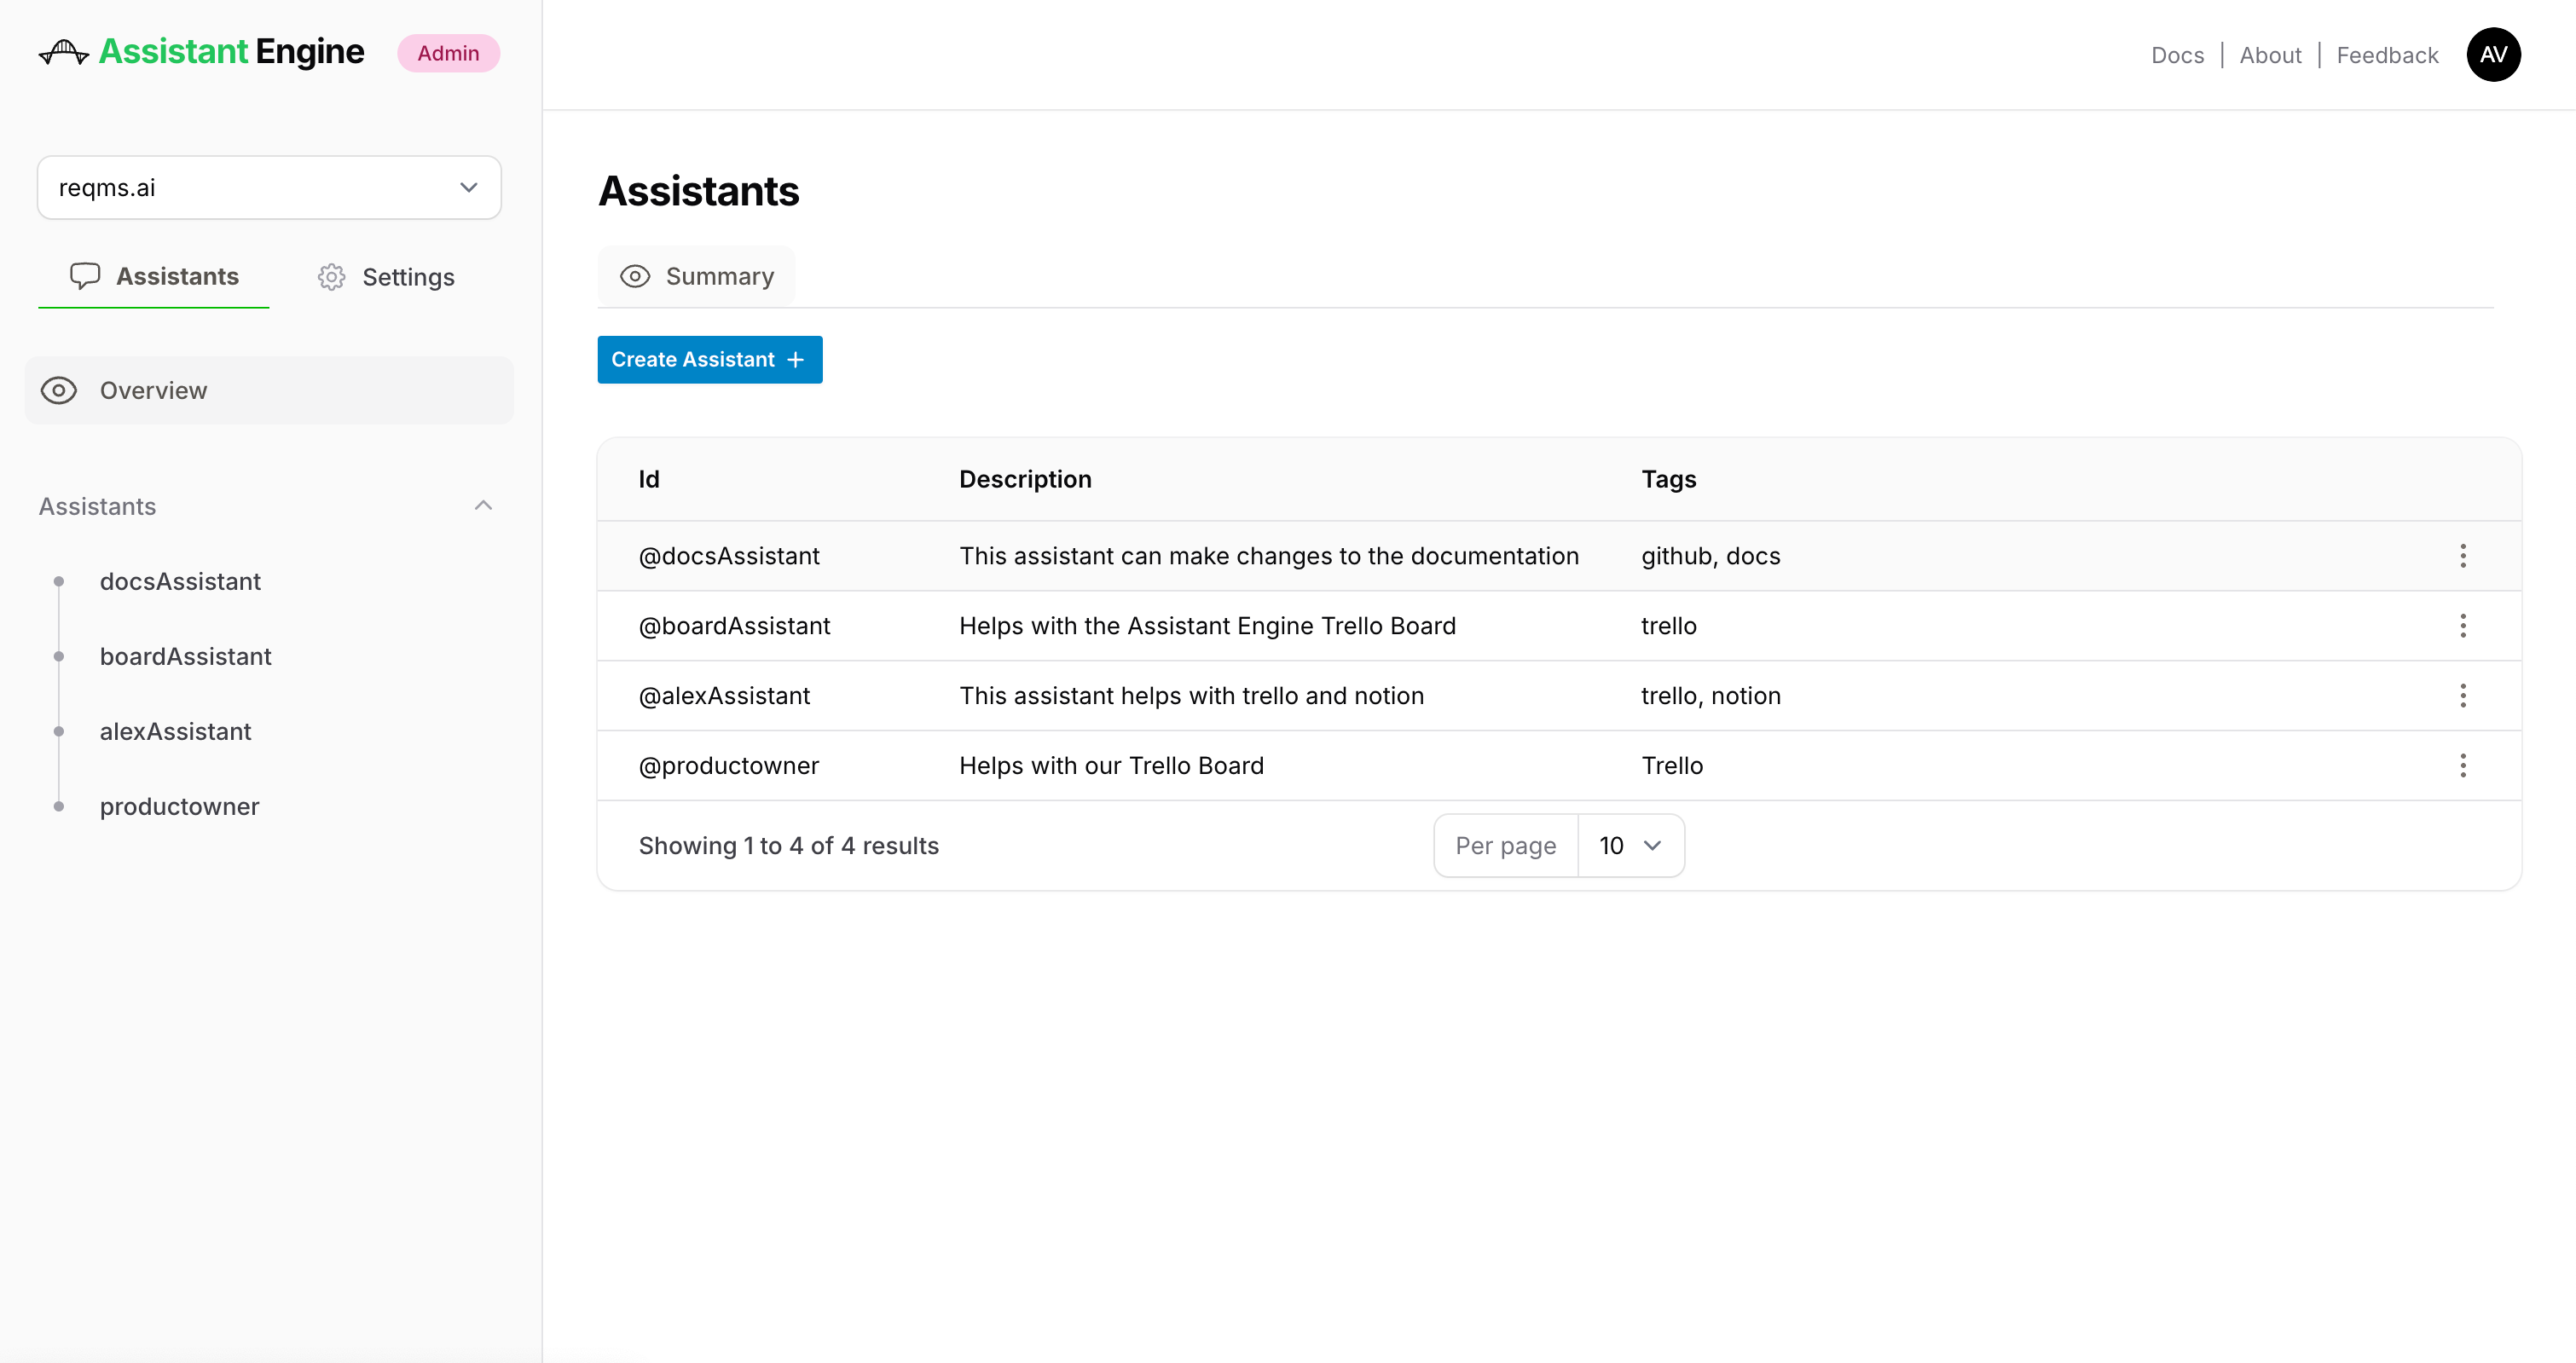
When you want to create a new assistant nagivate to the assistant overview page. From here click on "Add" and you will be guided through the three step process.
1.Define Instructions
General Instructions
The setup process begins with defining the Assistant’s purpose and scope. This includes specifying its accessibility and outlining its role through an instruction prompt.
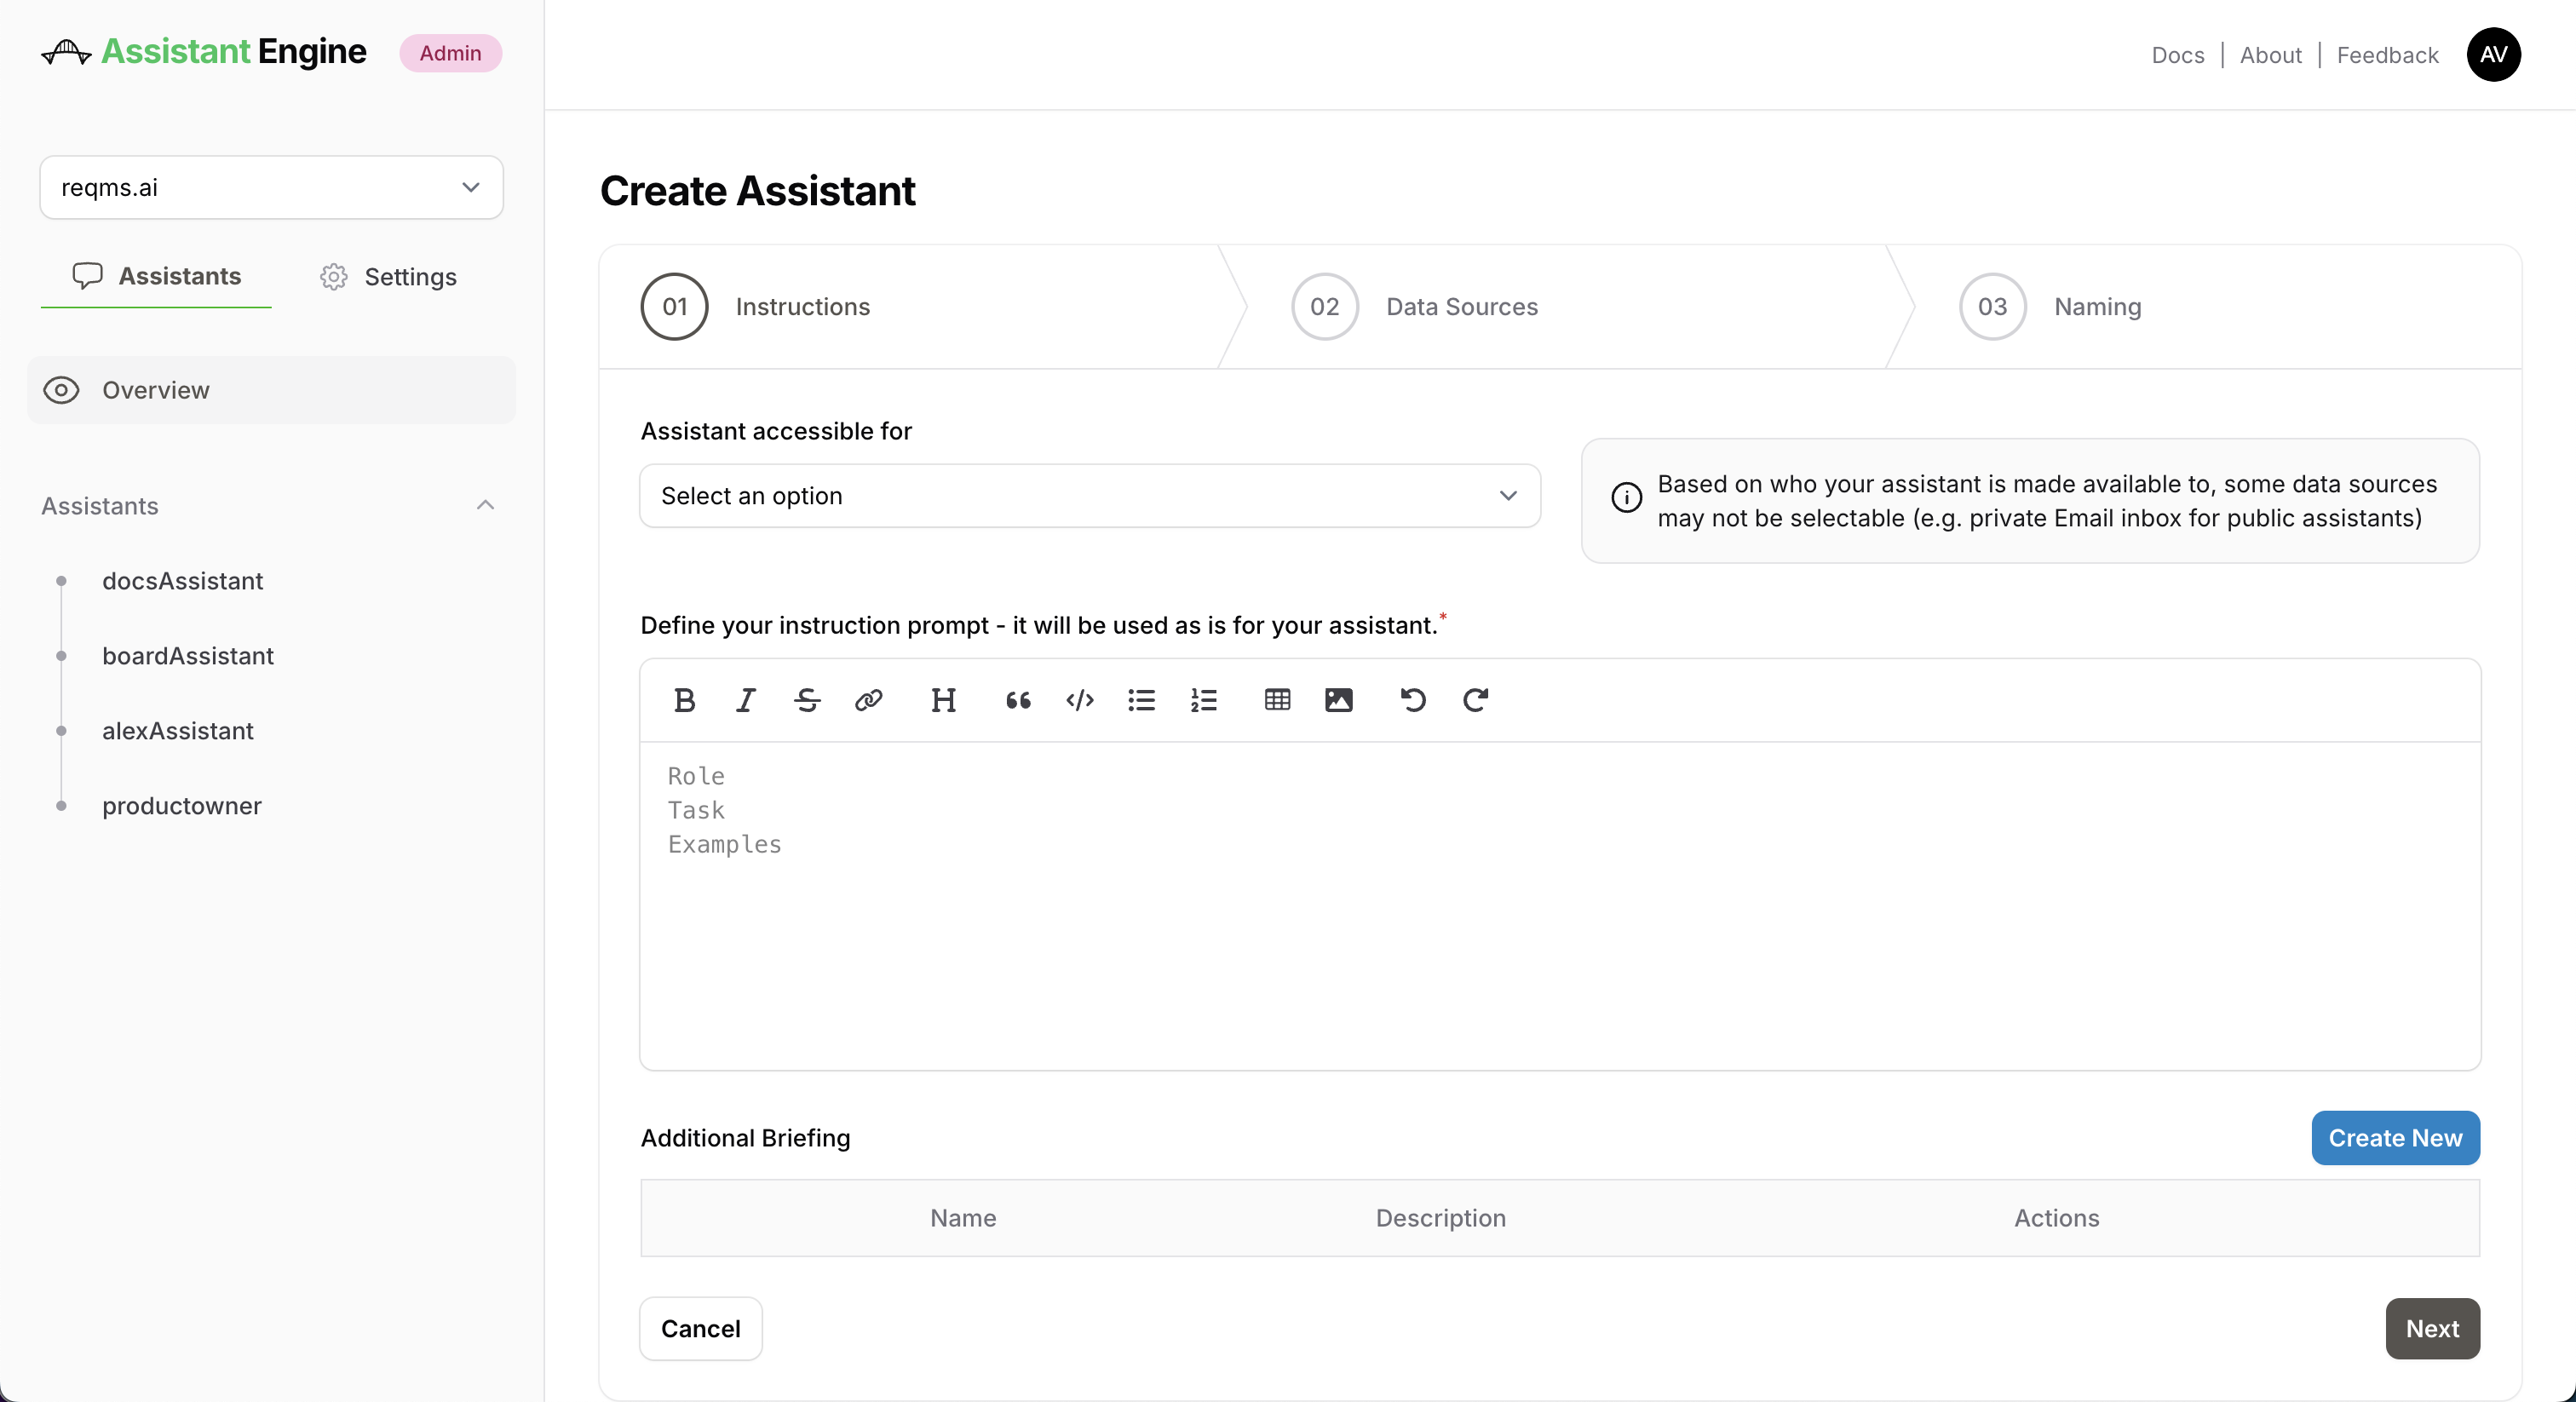
Assistant Accessibility:
-
Select who can access this Assistant.
-
Based on who your assistant is made available to, some data sources may not be selectable (e.g. private Email inbox for public assistants)
- Private: Accessible only to you, ideal for personal tasks or sensitive information.
- Group: Available to a specific team or department, such as marketing or product management.
- Company: Accessible company-wide, suitable for organization-level assistants like those handling broad operational tasks.
Note
Once Accessibility is defined it can not be changed anymore. This is due to the data access limitations that are set with it. If you still want to change access to your assistant afterwards you will have to delete your current assistant and create a new one.
Instruction Prompt:
This is where you define the Assistant’s role and purpose. Use this space to specify what the Assistant should do, how it should behave, and any relevant examples.
Example:
Crafting an effective prompt is a balance between precision and brevity. It should be specific enough to achieve the desired outcome, yet concise to minimize costs and avoid overwhelming the LLM, ensuring optimal comprehension. For further guidance, refer to the OpenAI Prompt Engineering Guidebook.
Selective instructions
Choose from a list of pre-defined documents or briefings that the Assistant can use for additional context or add new individual briefings using the Create New button.
For more information on selective instructions see here.
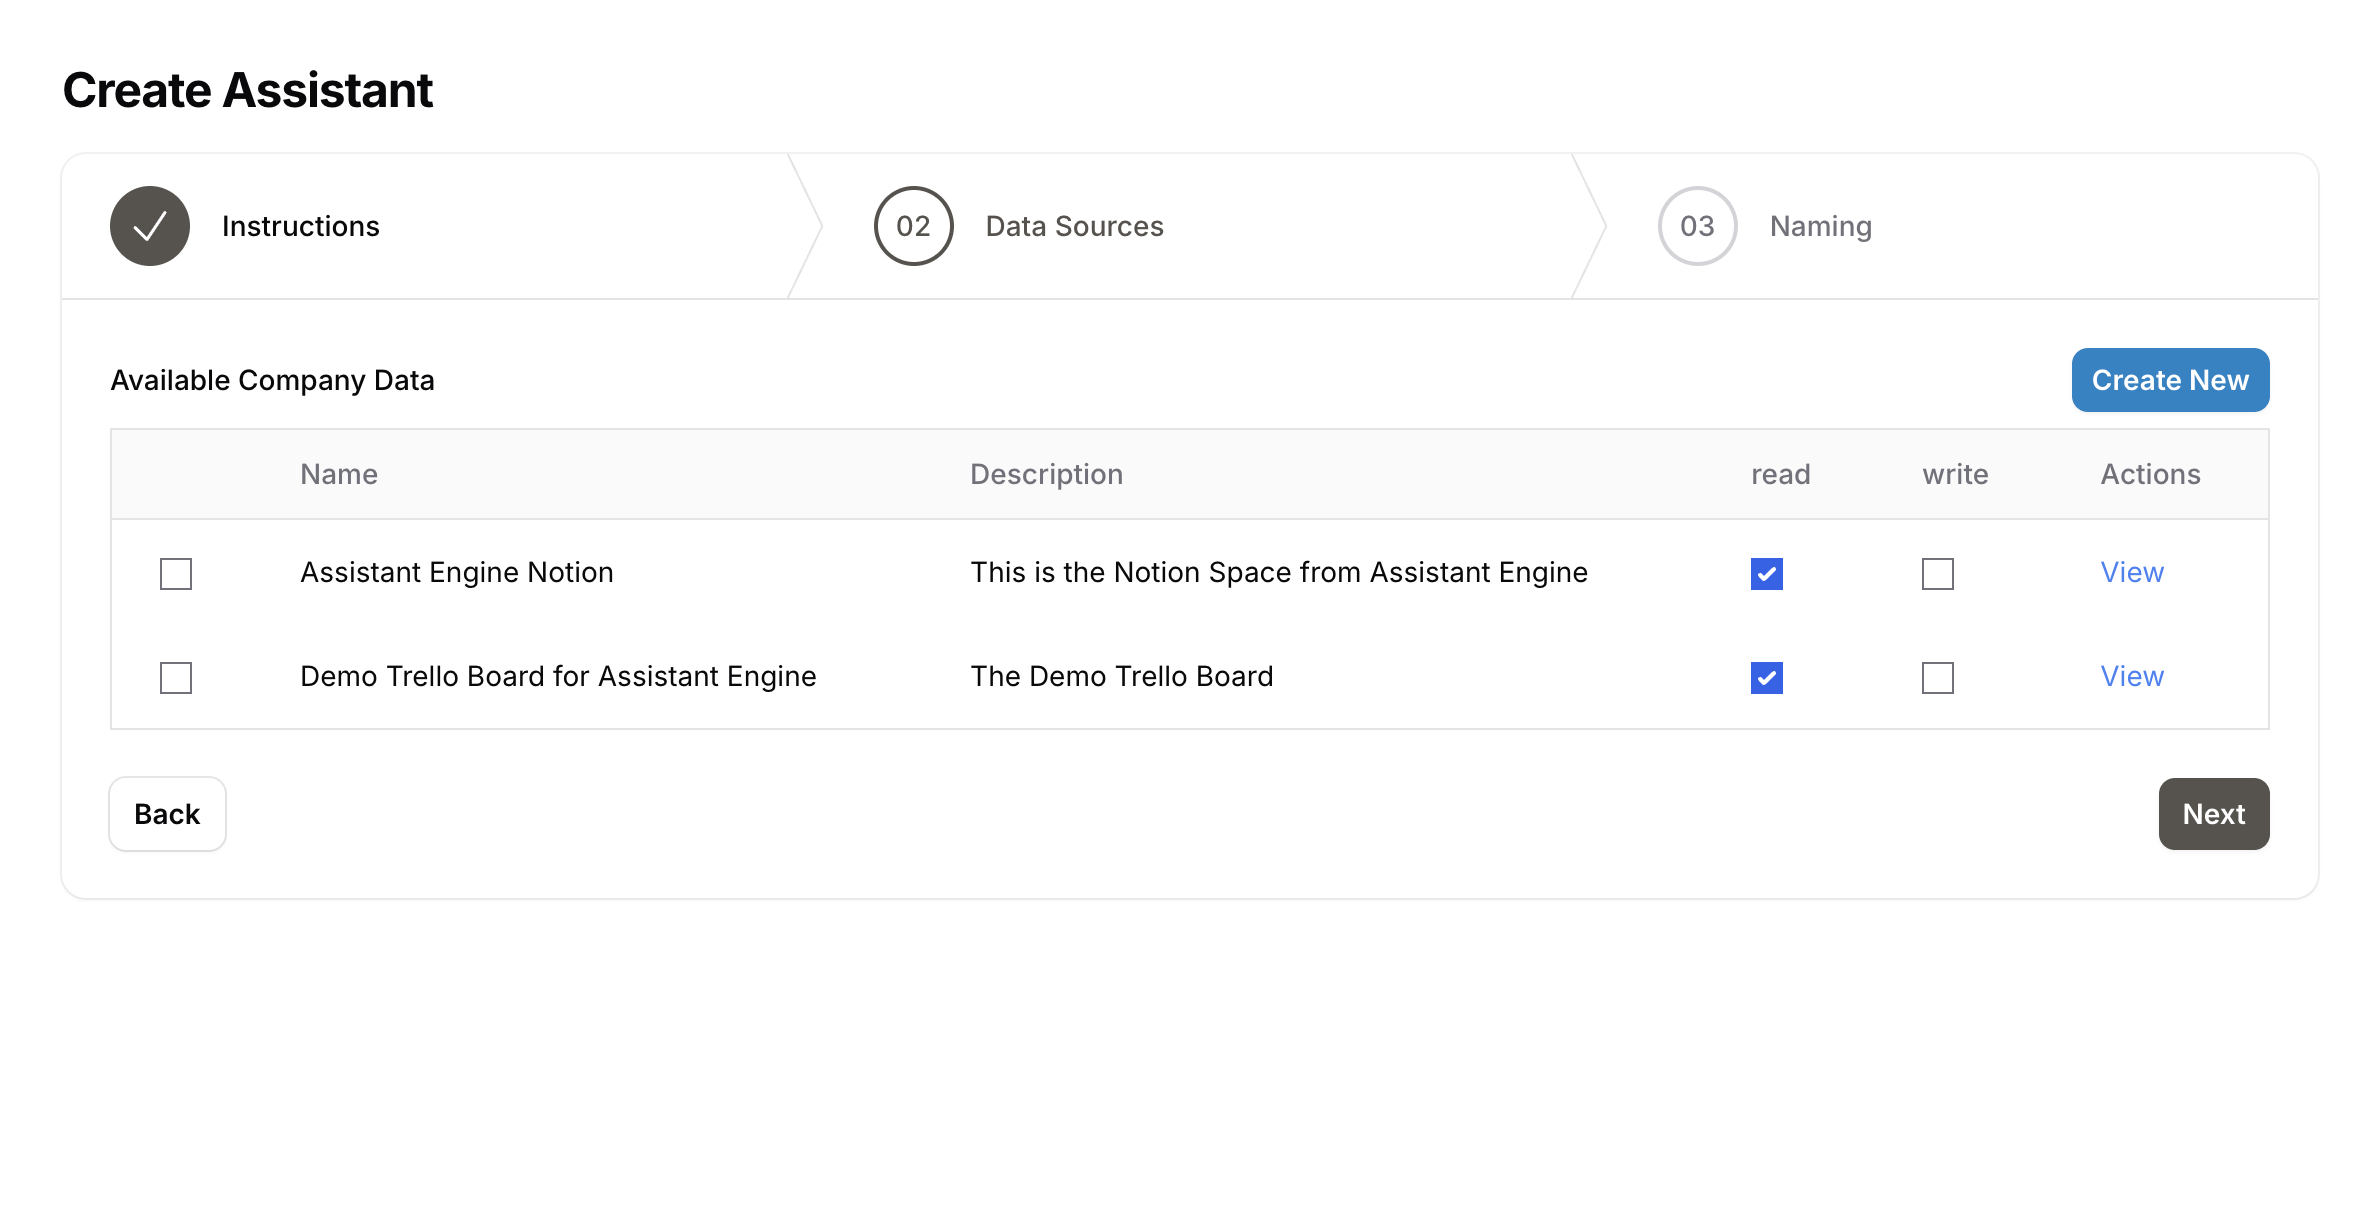
2. Connect Data Sources
Assistants derive their advanced functionality from the data sources you connect during this step. The data sources are generally set up and defined by the admins in your company and categorized as Company, Group, and Private for access control.
(Based on who your assistant is selected to be available to, some data sources may not be selectable, e.g. private Email inboxes won’t be selectable for public assistants)
Available Company Data:
Includes data made accessible by the admin for the entire organization, such as:
- Overall Trello Boards (e.g. “Company’s Sustainability Initiatives”)
- Shared Email Addresses (e.g.,
all@assistant-engine.com)
Available Group Data:
Data restricted to a specific group, such as:
- Trello Boards assigned to a particular team.
- Email accounts tied to team functions (e.g.,
marketing@assistant-engine.com) - PIM for Product Data Management (made available via OpenAPI connection)
Available Private Data:
Data sources exclusive to the user setting up the Assistant, such as:
- Personal Email Accounts
- Private Teams Channels
Note: Publicly accessible websites can also be connected by Builders per default.
For more on how to set up data sources (by Admin) see the dedicated documentation part here.
3. Naming and Description
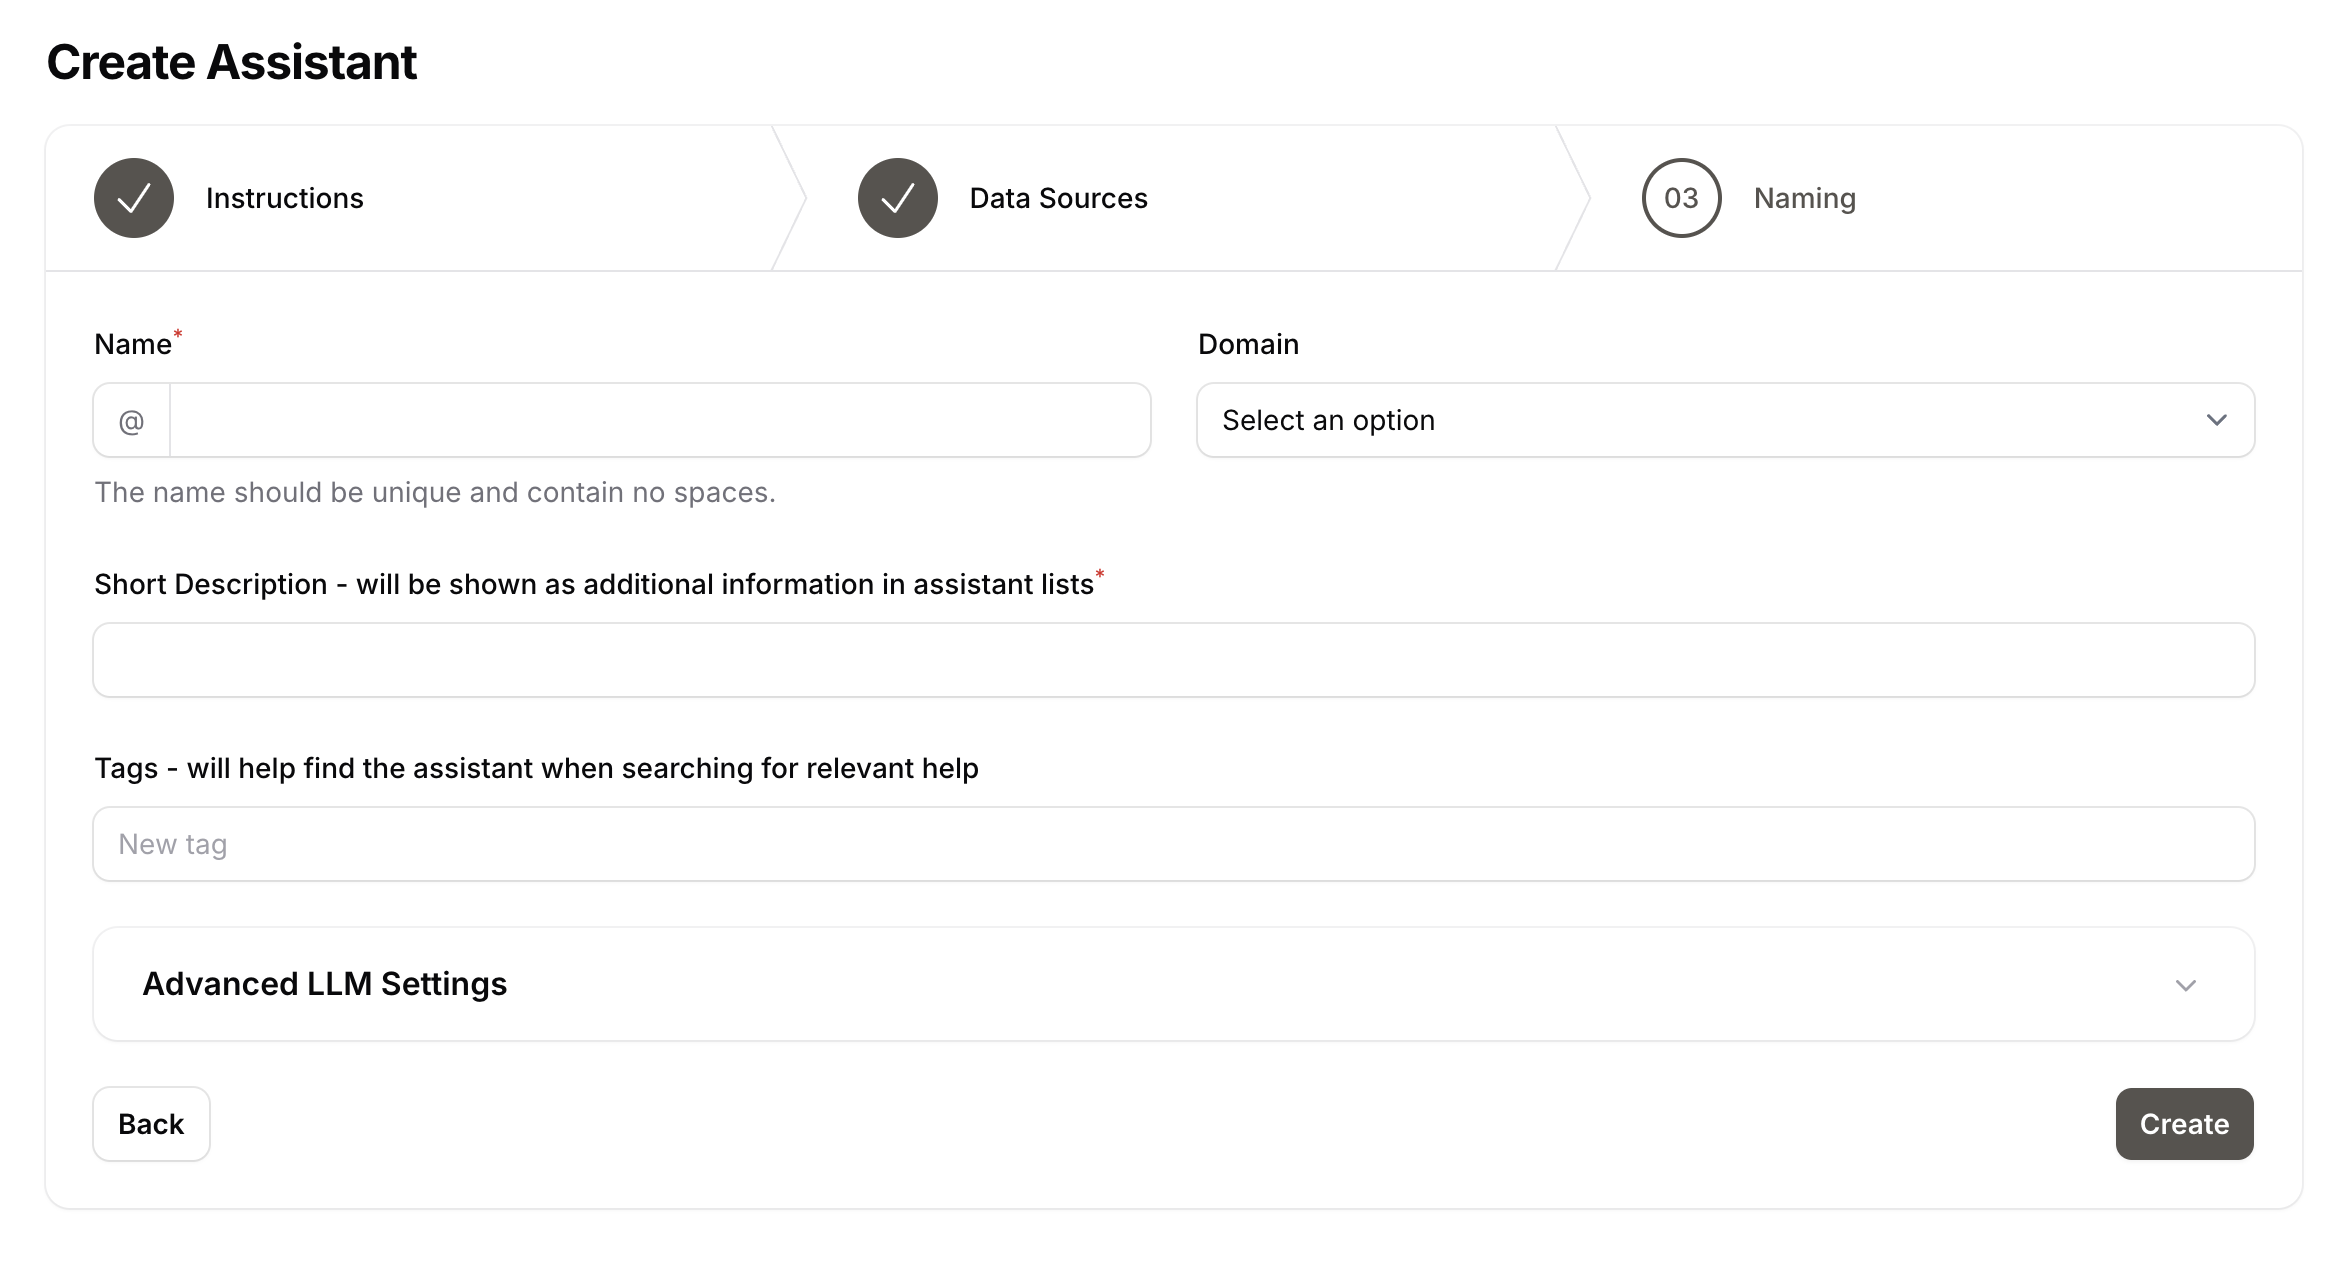
This step personalizes your Assistant, making it easily identifiable in your project and company.
Name:
Enter a unique, descriptive name that clearly defines the Assistant’s purpose.
Example: “SEOAssistant” or “DailyPOAssistant”
Short Description:
Provide a brief explanation of the Assistant’s function. This will be displayed in Assistant lists, helping you and others quickly understand its purpose.
Example: “Summarizes daily updates from Trello boards for standup meetings.”
Domain:
Choose the most relevant domain entry. it won't affect or limit the way your assistant works. It'll just be easier to find it later.
Tags:
Tags further improve the searchability of the Assistant. Use keywords related to its task or functionality.
Example: “Reports,” “Analysis,” “Email.”
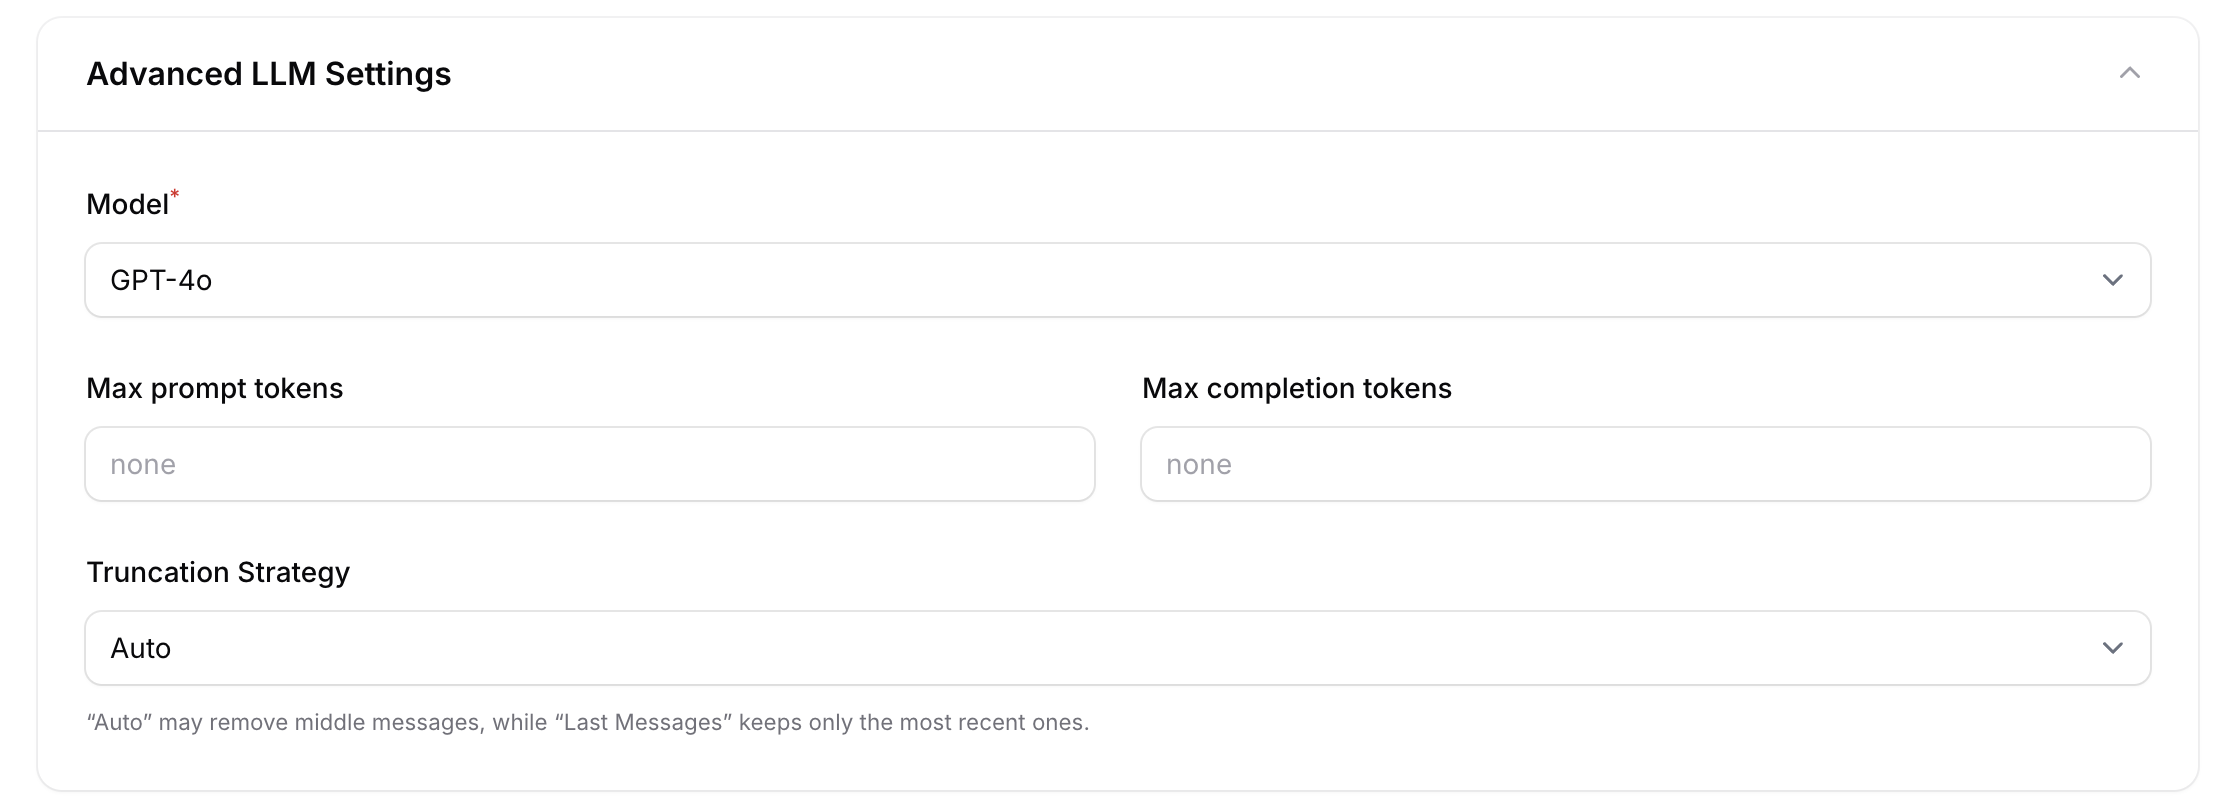
4. Advanced LLM Settings (Optional)
Customize the underlying language model to optimize the Assistant’s performance based on your needs.
Model Selection:
Choose the specific language model your Assistant will use. This can impact its efficiency and accuracy depending on the task but also lower your LLM costs.
Truncation Strategy:
Specify how the Assistant should handle inputs exceeding token limits. Set to Auto by default. Alternatively et's you define the number of Last Messages sent to the LLM .
Max prompt tokens:
Limit the amount of tokens sent to the LLM in order to prevent excessive LLM costs.
Max completion tokens:
Limit the amount of tokens received from the LLM to prevent excessive LLM costs.
5.Finalizing Your Assistant
Once you’ve completed all the steps, click Finish to activate your Assistant. It will now appear in your navigation and on the overview page, ready to assist through its individual chat interface. You can revisit the configuration at any time to update permissions, instructions, or data sources.
